To cover a curved seat cushion, you will need to use a fabric that is stretchy or has some give to it. You may also need to cut the fabric into smaller pieces so that it can fit around the curve of the cushion. Once you have the fabric in place, you can use a hot glue gun or sewing machine to secure it in place.
- Measure the length and width of your seat cushion
- Cut a piece of fabric that is 2 inches longer and wider than your seat cushion
- Fold the fabric in half lengthwise and widthwise, then cut a curved edge along the fold lines
- Pin the fabric around the seat cushion, right sides together
- Sew the two long sides and one short side together with a 1/2-inch seam allowance, leaving the other short side open for turning
- Turn the cover right side out and insert the seat cushion into it
HOW TO SEW A ROUNDED SEAT CUSHION | UPHOLSTERY FOR BEGINNERS | TUB CHAIR | Faceliftinteriors
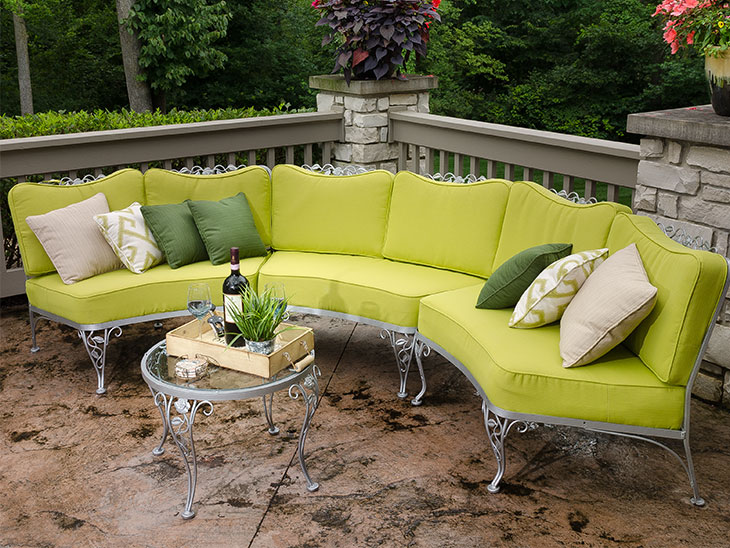
How to Sew a Curved Seat Cushion
If you’ve ever sat in an uncomfortable chair with a flat seat cushion, you know how important it is to have a properly padded seat. A curved seat cushion can add both comfort and style to any chair, and it’s not as difficult to sew as you might think. With just a few simple steps, you can create a custom cushion that will make any chair more comfortable.
Start by measuring the width and depth of your chair seat. Then, cut two pieces of fabric that are slightly larger than your measurements. On one piece of fabric, draw a curve that is about halfway between the width and depth of your seat.
Cut out the curve and set aside the excess fabric.
Next, place the two pieces of fabric right sides together and pin them in place. Sew around the edge of the fabric using a 1/2-inch seam allowance, leaving a small opening for stuffing.
Trim any loose threads and turn the cushion right side out through the opening.
Use a spoon or your fingers to stuff the cushion with polyester fiberfill until it is firm but still comfortable. Sew the opening closed using a blind stitch or ladder stitch.
And that’s it!
How to Upholster a Curved Bench Seat
If you have a curved bench seat that needs upholstering, there are a few things to keep in mind. The first is to make sure you have the right supplies. You’ll need fabric, batting, and a staple gun with staples that are long enough to go through all the layers of fabric and into the wood.
You’ll also need scissors and a measuring tape.
The next step is to measure the seat so you know how much fabric you’ll need. Then, cut the fabric and batting to size.
Make sure to leave enough extra fabric around the edges so that you can staple it into place later.
Once you have your fabric and batting cut to size, it’s time to start stapling them into place. Begin by attaching the batting to the underside of the seat using your staple gun.
Then, lay the fabric over top of the batting and pull it tight before stapling it down as well. Work your way around the entire seat, making sure that everything is nice and tight before moving on.
Once all of the fabric is attached, trim away any excess material from around the edges.
Now your newly upholstered curved bench seat is ready for use!
How to Cover a Shaped Cushion
If you have a uniquely shaped piece of furniture, like an antique settee or a rocking chair, you may be wondering how to cover the cushions. Here are some tips for covering shaped cushions:
1. Choose a fabric that is durable and easy to clean.
You don’t want to have to worry about your cushion covers getting ruined easily.
2. If possible, find a patterned fabric that will help disguise any imperfections in your cutting or sewing. A busy pattern can also help to hide stains.
3. Cut the fabric slightly larger than you need it, so that you can tuck it in and create a snug fit. This will help prevent the fabric from slipping and looking sloppy.
4. Use a heavy-duty needle and thread (or even upholstery thread) to sew the cushion cover closed.
Double-stitch around the edges for extra durability.
5 . If you’re not confident in your sewing skills, consider using velcro or adhesive tape instead of stitching the closure shut.
Just be sure that whatever method you use will be strong enough to hold the cushion cover in place without coming undone easily .
How to Sew Rounded Corners on Cushions
Are you looking to add a touch of softness and style to your home décor? Rounded corners on cushions are a great way to do that! Here’s how you can sew them yourself:
1. Start by cutting out four equal-sized squares of fabric. Then, using a ruler or template, draw a line from the corner of each square to the midpoint of the opposite side. Cut along these lines.
2. Next, pin two squares together with the right sides facing each other. Sew around the edge, leaving a 1/4″ seam allowance. Repeat with the remaining two squares.
3. Now it’s time to create the rounded corners. To do this, simply snip off the corner points (as shown in the photo below) and then round them off with scissors. Be careful not to cut into your stitching!
4. Once all four corners have been rounded, turn your cushion cover right-side out and stuff it with polyfill or another type of stuffing material.
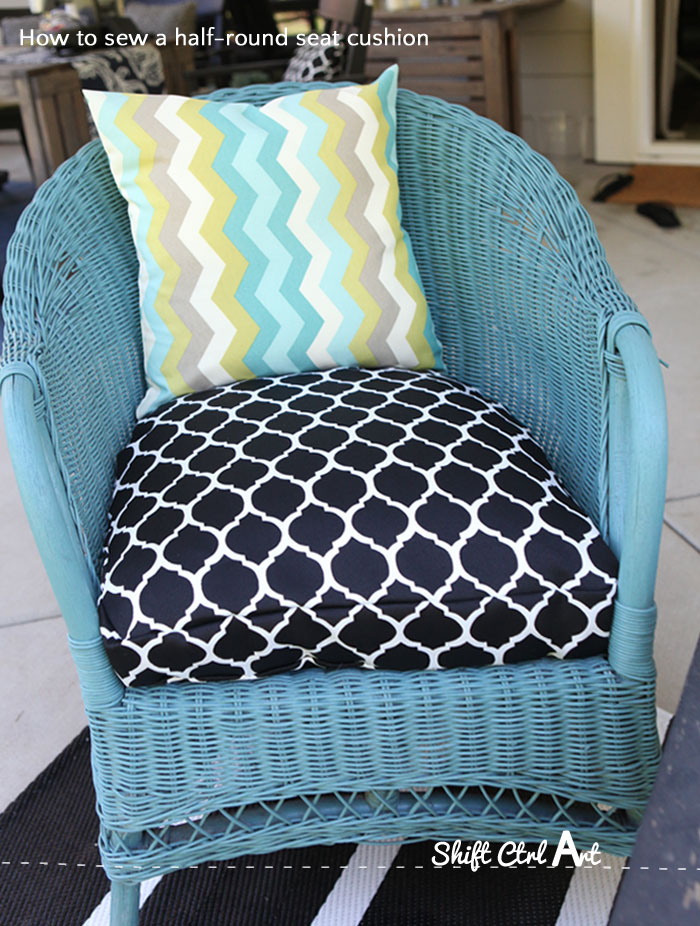
Credit: ahomefordesign.com
How Do You Upholster around Curves?
When it comes to upholstering around curves, there are a few things you need to keep in mind. First, you’ll want to make sure you have the right tools for the job. A curved needle and strong thread are a must.
You’ll also want to use a stapler or other fastening device to secure the fabric in place.
Next, you’ll need to cut your fabric to the correct size. Make sure to allow for extra fabric at the curves so that you can tuck it in and create a smooth finish.
Once your fabric is cut, start by stapling or pinning it into place at the center of the curve. Slowly work your way outwards, making sure to smooth out any wrinkles as you go.
Finally, once you’ve reached the end of the curve, trim away any excess fabric and secure it in place with more staples or pins.
And that’s it! With a little patience and attention to detail, you can easily upholster around any curve.
How Do You Cover a Round Cushion Pad?
If you’re looking to cover a round cushion pad, there are a few things you’ll need to keep in mind. First, measure the circumference and diameter of the cushion. You’ll also need to determine how deep you want the finished product to be.
Once you have those measurements, cut a piece of fabric that is twice the width of the circumference and add an extra inch for seam allowances. To make sure the fabric is long enough, measure from one side of the fabric to the other and add 1/2 an inch for seam allowances. Then, fold the fabric in half with right sides together and sew along the edge using a 1/2-inch seam allowance.
Next, turn the tube right side out and insert your cushion pad. Finally, hand-sew or machine-sewthe opening closed.
How Do You Cover a Curved Chair Back?
When it comes to upholstering a curved chair back, there are a few things to keep in mind. First, you’ll need to use a template or pattern to cut your fabric to the correct size and shape. Second, you’ll need to be careful when stapling or tacking the fabric into place so that you don’t create any puckers or wrinkles.
And finally, you may want to consider using welting cord or piping along the seams to give the finished product a professional look.
If you’re feeling ambitious, you can try tackling this project without a template. Just be sure to take your time and cut the fabric pieces carefully so they fit together nicely when wrapped around the curve of the chair back.
If you go this route, it’s also important to take care when pulling the fabric tight and stapling it into place so that everything stays smooth and even.
Using welting cord or piping is optional but can definitely add a nice touch. Simply sew it onto the edge of the fabric before wrapping it around the chair back and attaching it in place.
This will create clean lines and help hide any imperfections in your upholstery job.
How Do You Reupholster a Round Seat?
If you have a round seat that needs reupholstering, there are a few things to keep in mind. The first is that you’ll need more fabric than you would for a square or rectangular seat. This is because the fabric will need to be wrapped around the entire circumference of the seat, and you’ll also need some extra to tuck in at the corners.
The second thing to consider is the type of fabric you’ll use. A light-weight cotton or linen is a good choice for a round seat, as it will drape nicely over the curves. Avoid using a stiff fabric like canvas or denim, as this will make the seat look lumpy.
To start, remove any old fabric and padding from the seat. If there are any nails or staples holding it in place, remove them as well. Once everything is removed, give the seat a good vacuum to get rid of any dust or debris.
Next, cut your new fabric to size. Wrap it around the seat and staple it into place at the back. Make sure that the fabric is pulled taunt so that there are no wrinkles or sagging areas.
Then, add your padding on top of the fabric and staple that into place as well. Finally, reattach any trim pieces that were on the old upholstery (such as welting cord or piping).
Conclusion
If you have a piece of furniture with a curved seat cushion, you may be wondering how to go about covering it. Here are some tips to help you get started.
First, measure the width and depth of the cushion.
You’ll need to add a few inches to these measurements to allow for seam allowances.
Next, cut out a piece of fabric that is slightly larger than the cushion. Fold the fabric in half, wrong sides together, and pin it in place.
Now, using a sewing machine or needle and thread, stitch around the edge of the fabric, leaving an opening for stuffing. Turn the fabric right side out and stuff it with batting or another filling material. Hand stitch the opening closed.
Finally, lay the fabric over the cushion and secure it in place with pins or Velcro strips.